Overview
Batch Freight Shipping allows you to create and process up to 250 freight shipments in one submission. After you upload shipment data, UPS Forwarding Hub validates the information, displays rates, and allows you to create shipments and download shipping documentation.
This feature can reduce manual effort and provide greater visibility when managing high-volume shipping activity.
When to Use Batch Shipping
Use this article if you:
Have a large number of freight shipments to process.
Want to process multiple shipments in a single submission.
Before You Begin
Make sure you have:
- An active UPS Forwarding Hub account with shipment
- A linked UPS freight shipper account number in good standing.
- A properly formatted CSV file.
Make sure you understand:
- Maximum 250 shipments per upload.
- UFH only accepts CSV files only (.csv).
- Rates displayed during the review process are estimates only and may change before shipments are created. Final rates are determined when shipments are successfully created.
- UPS Forwarding Hub validates your file after upload and identifies any errors that must be corrected before affected shipments can be created.
- Only valid shipments are created when you select Create Shipments.
- All shipments within a batch must use the same Pickup Date.
- Only one batch can be processed at a time for the same shipper account.
- Batch Freight Shipping currently requires account enablement and may not be available for all customer accounts.
Step 1: Upload Batch Shipment File
- Sign in to UPS Forwarding Hub.
- Select Book on the left navigation panel
- Click Get Started for Batch Freight Shipping.

- Choose your Shipper Account Number.
- Select whether to use Consolidation (enabled by default).
Consolidated Rates (Default)
Eligible shipments are grouped together and priced as a consolidated shipment, which may reduce transportation costs.
Non-Consolidated Rates
Each shipment is rated and displayed individually.
- Enter:
- Pickup Date
- Ready Time
- Close Time
- Drop-off Time (if applicable)
- Upload your CSV file (up to 250 rows).
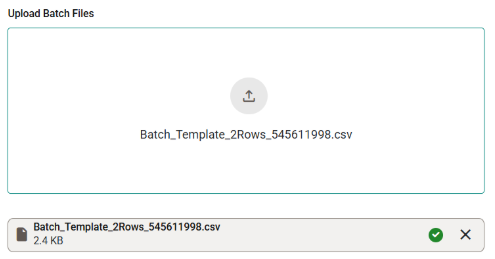
- Select Continue.
The system will validate your file and display any errors.
Step 2: Review Shipment Data for Accuracy
After validation processing:
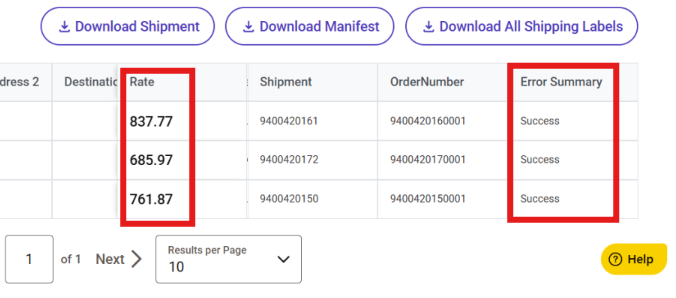
- Review shipment details and rates.
- View any validation issues in the Error Summary column.
- Compare Consolidated and Non-Consolidated pricing.
- Download a validated CSV if needed.
Rates shown during review are estimates and may change before shipment creation.
Step 3: Submit Shipments
When you're ready:
- Select Create Shipments.
- The system creates all valid shipments.
- A unique Batch ID is generated.
After processing, you can download:
- Shipping Labels
- Manifest
- Shipment Extract (shipment numbers and rates)

After Processing Batched Shipments
Once completed:
- Shipments appear in your Activity Feed.
- Check your email for confirmation notification.
- Batch details are retained in Batch History for future reference.
Frequently Asked Questions
What is Batch Freight Shipping?
Batch Freight Shipping allows you to upload and process up to 250 freight shipments through a single submission in UPS Forwarding Hub.
Who can use Batch Freight Shipping?
Batch Freight Shipping is currently available to customers whose accounts have been enabled for the feature. Access is managed on an account-by-account basis during the initial release phase.
How many shipments can I include in one file?
You can include up to 250 shipments in each batch upload.
What file type can I upload?
Batch Freight Shipping accepts CSV files.
Can shipments in the same batch have different pickup dates?
No. All shipments in the same batch must use the same Pickup Date.
What should I do if my file has a duplicate file name?
Rename the CSV file, and then upload it again.
What should I do if required columns are missing?
Download the list of missing columns, add the required information to your original file, and then upload the corrected file again.
How do I correct validation errors?
Review the issues in the Error Summary column. Download the validated file, correct the indicated rows, and upload the corrected file again.
Why can’t I submit another batch for the same shipper account?
Only one batch can be processed at a time for the same shipper account. Wait until the current batch has finished processing before submitting another file for that account.
Can I compare consolidated and non-consolidated rates?
Yes. After file validation, you can compare Consolidated and Non-Consolidated pricing before creating shipments. Rates displayed during review are estimates and may change before shipment creation.
What can I download after the batch is processed?
You can download shipping labels, a manifest, and a shipment extract containing shipment numbers and rates.
Where can I find my processed shipments?
Processed shipments appear in your Activity Feed. You can also access batch details in Batch History, and a confirmation email is sent after processing.
Related Articles
Was this article helpful?
That’s Great!
Thank you for your feedback
Sorry! We couldn't be helpful
Thank you for your feedback
Feedback sent
We appreciate your effort and will try to fix the article